

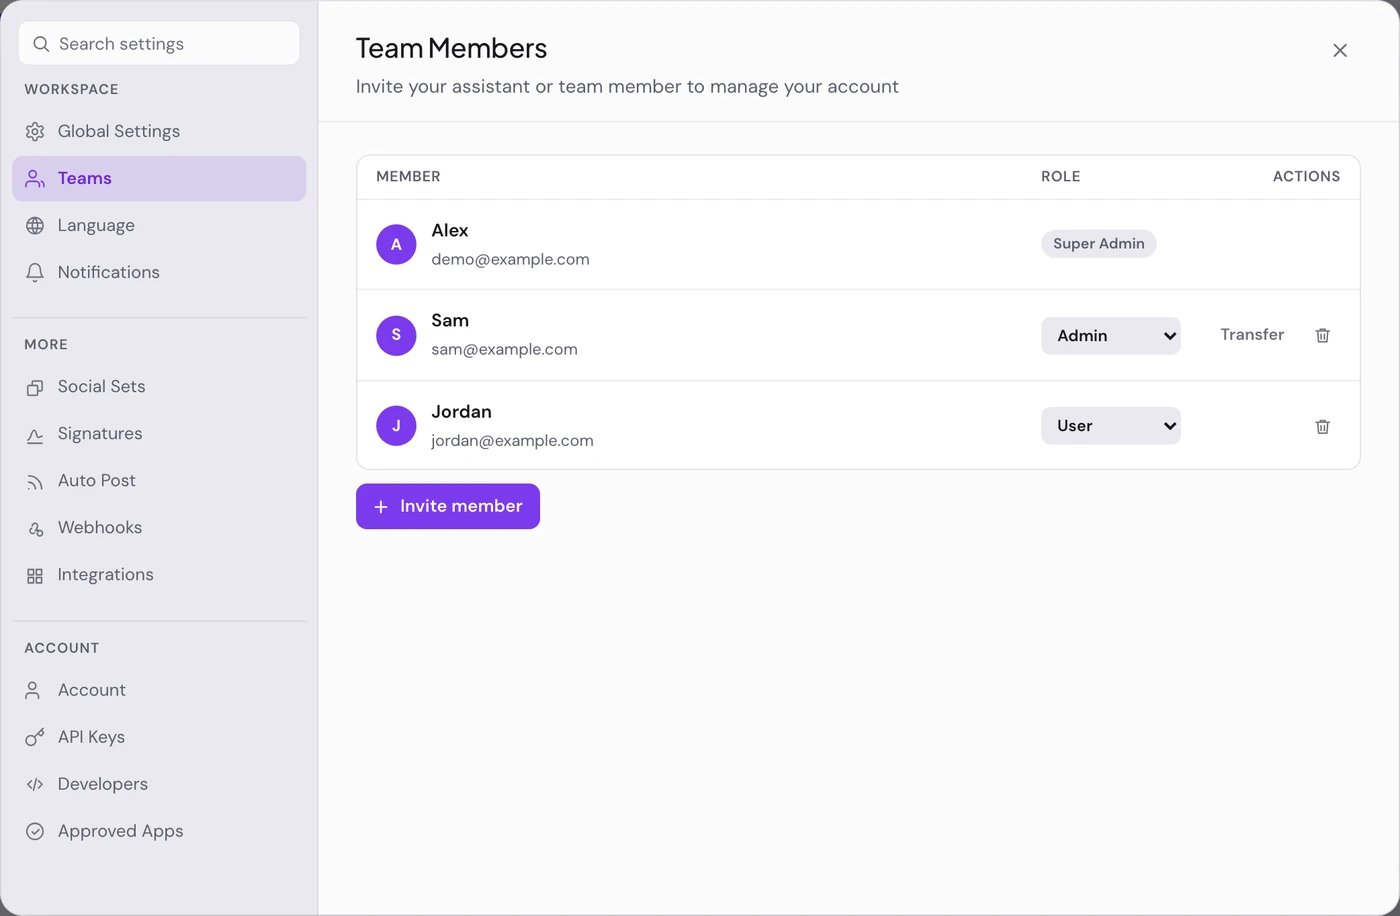
Invite a member
1
Open the invite pane
In Settings > Teams, choose Invite member. The Add Member pane opens.
2
Pick a role
Under Role, choose User or Admin. The next section explains the difference.
3
Send the invite
Leave Send invitation via email? checked, enter the Email and choose Send Invitation Link. To share the link yourself, clear it and choose Copy Link.
Roles
On each member’s row you can:
- Change the Role of anyone whose role is below yours, to User or Admin.
- Remove anyone whose role is below yours with the trash button. Their account stays; they only leave this workspace.
- Leave the workspace yourself from your own row, after “Are you sure you want to leave this workspace?”. Anyone can also leave from the workspace switcher: see Leave a workspace.
Leave a workspace
Any member can leave a workspace, whatever their role, as long as they belong to another workspace too.1
Open the workspace switcher
At the bottom of the left rail, choose the workspace’s name. Leave workspace is the last row of the list. It shows when you belong to more than one workspace.
2
Leave
Choose Leave workspace, then Leave after “Are you sure you want to leave this workspace?”. It leaves the workspace you are in now.
- You cannot leave your only workspace. Your account needs one to sign in to.
- The last Super Admin cannot leave. Hand the workspace over first.
Hand the workspace to someone else
1
Make them an Admin
The new owner must already be an Admin. Change their Role to Admin if needed.
2
Transfer
As the Super Admin, choose Transfer on their row, then Transfer again to confirm. They become Super Admin and you become an Admin.
Share a published post with a client
1
Open the preview
On the calendar or in Posts, open Preview Post on a published post. The preview opens in a new tab.
2
Copy the link
Choose Share with a client. The link is copied, ready to paste anywhere.
Good to know
- The preview link shows a post only once it is published. For a draft or a scheduled post the page reads “Post not found”.
- PostQueen has no approval step. A scheduled post goes out at its time. To hold a post for review, save it as a draft and schedule it once it is approved. See Create a post.
- If the workspace moves to a plan without team members, every member except the Super Admin is switched off. Moving back to Growth or higher switches them on again, with the same roles.
- When the workspace has no active plan, Users see “A subscription is needed” and are asked to contact an admin. Only Admins and Super Admins can choose a plan.
If something goes wrong
Next steps
Plans and limits
Which plans include team members.
Customers
Group channels by client and filter the calendar by them.
Connections
The API key only admins can reveal, and the apps you approved.
Settings
Every Settings tab, and who sees it.